Windows Services là tính năng quan trọng nhất cho các ứng dụng lâu dài để chạy các dịch vụ tự động ngay sau khi khởi động hệ thống.Chúng tôi có thể tự điều khiển các Dịch vụ này bằng cách bắt đầu và dừng tại một thời điểm cụ thể.
Bạn có thể xem những window service chạy bằng cách Run > nhập services.msc và Enter.
Các bước để tạo windows Service với C#:
Bước 1:
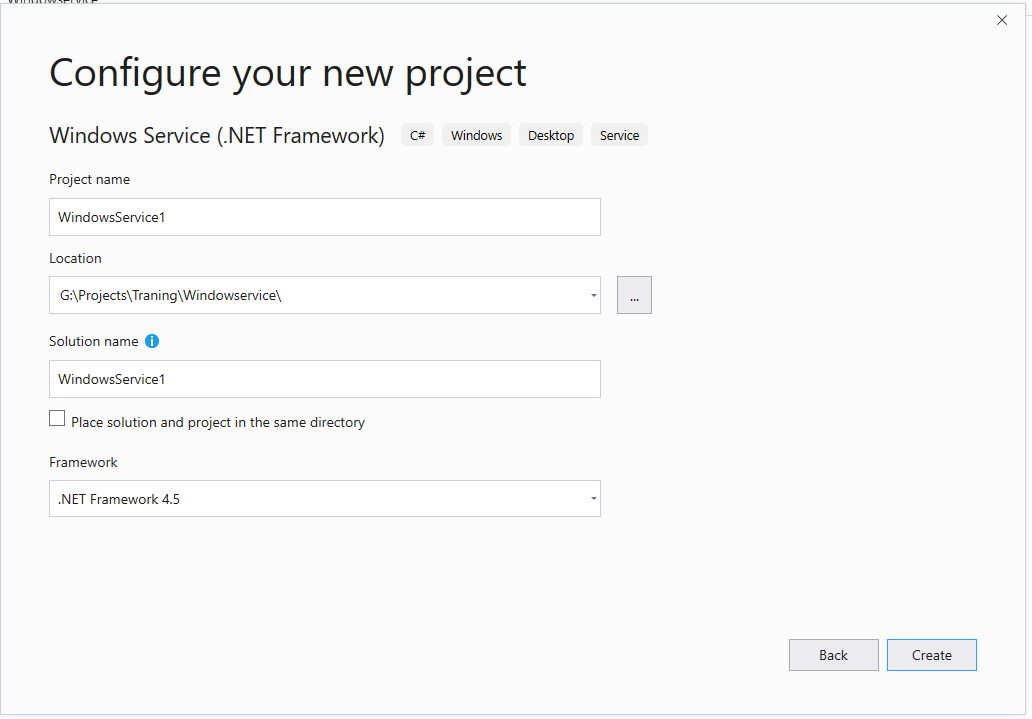
Mở Visual studio, tạo dự án Windows Service

Bạn có thể xem những window service chạy bằng cách Run > nhập services.msc và Enter.
Bước 1:
Mở Visual studio, tạo dự án Windows Service

Bước 2:
Mở file Service1.cs file. Đổi hết thông tin Service1 trong project thành DemoService. Add this code to that fileusing System;using System.Collections.Generic;using System.ComponentModel;using System.Data;using System.Diagnostics;using System.IO;using System.Linq;using System.ServiceProcess;using System.Text;using System.Threading;using System.Threading.Tasks;namespace WindowsService1{public partial class DemoService: ServiceBase{public DemoService(){InitializeComponent();}static void run(){//while (true){StreamWriter str = new StreamWriter(@"D:\\ContinuosLoop.txt", true);str.WriteLine("Visit DotNetFunda Regularly");str.Close();}}Thread thr = new Thread(new ThreadStart(run));protected override void OnStart(string[] args){StreamWriter str = new StreamWriter(@"D:\\Log.txt", true);str.WriteLine("Service started on : " + DateTime.Now.ToString());str.Close();thr.Start();}protected override void OnStop(){StreamWriter str = new StreamWriter(@"D:\\Log.txt", true);str.WriteLine("Service stoped on : " + DateTime.Now.ToString());str.Close();thr.Abort();}}}
Trong file Program.cs cũng đổi lại:
using System;using System.Collections.Generic;using System.Linq;using System.ServiceProcess;using System.Text;using System.Threading.Tasks;namespace WindowsService1{static class Program{/// <summary>/// The main entry point for the application./// </summary>static void Main(){ServiceBase[] ServicesToRun;ServicesToRun = new ServiceBase[]{new DemoService()};ServiceBase.Run(ServicesToRun);}}}
Bước 3:
Click chuột phải vào màn hình design của DemoService.cs[Design] và thêm một Installer.


Bước 4:
Click chuột phải vào ServiceProcessInstaller1. Đổi Account Property thành LocalSytem

Click chuột phải vào ServiceInstaller1, nhập tên ServiceName là DemoService, là tên Service sẽ xuất hiện trong danh sách khi cài đặt. Đổi toàn bộ thông tin Service1 thành DemoService.

Bước 5
Build lại project, các file liên quan sẽ được output vào thư mục Bin
Build lại project, các file liên quan sẽ được output vào thư mục Bin
Chẳng hạn của mình là
G:\Projects\Traning\Windowservice\WindowsService1\WindowsService1\bin\Debug
Step 6: Cài đặt
Tạo một file .bat với nội dung
@ECHO OFFREM The following directory is for .NET 4.0set DOTNETFX2=%SystemRoot%\Microsoft.NET\Framework\v4.0.30319set PATH=%PATH%;%DOTNETFX2%echo Installing IEPPAMS Win Service...echo ---------------------------------------------------echo Input action: De Install Service -> i, De UnInstall Service -> uset /p input=""if "%input%" == "i" (C:\Windows\Microsoft.NET\Framework\v4.0.30319\InstallUtil "%~dp0WindowsService1.exe"echo ---------------------------------------------------echo Start window service ...net start "DemoService")if "%input%" == "u" (echo Uninstall window service ...C:\Windows\Microsoft.NET\Framework\v4.0.30319\InstallUtil /u "%~dp0WindowsService1.exe"echo ---------------------------------------------------)
Copy file .bat vào cùng thư mục với file .exe tạo ra sau khi build. Chạy file .bat, sau đó input chữ i để cài đặt service.

Như vậy là bạn đã tạo ra được một window service bằng C# net và cài đặt thành công.

Source: Bitbucket
Mình sẽ viết một bài khác hướng dẫn cách tạo Window Service cho project DotnetCore
Bài viết bổ ích
Trả lờiXóaCám ơn bạn. :)